- TOSIZE.de
- Do it yourself
- DIY Projects
Making a DIY TV cabinet from solid beech panels, by Jan
Making a DIY TV cabinet from solid beech panels, by Jan
Create this project yourself with sheet material cut to size by TOSIZE.de!
Jan
Above average
2 minutes
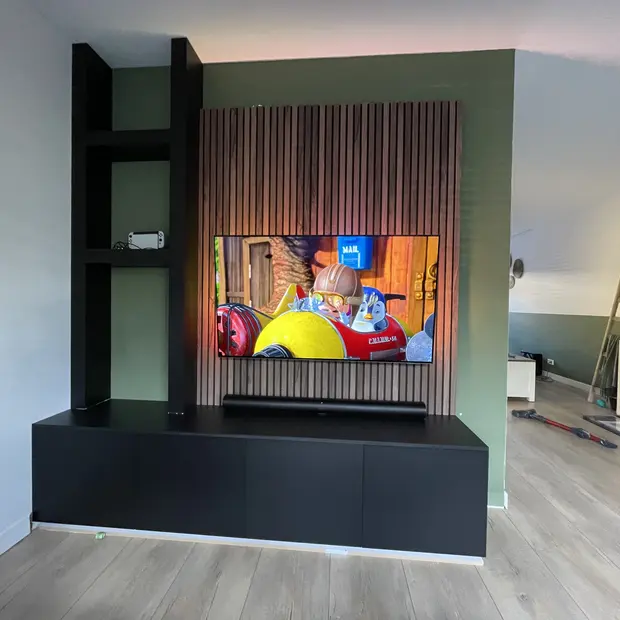
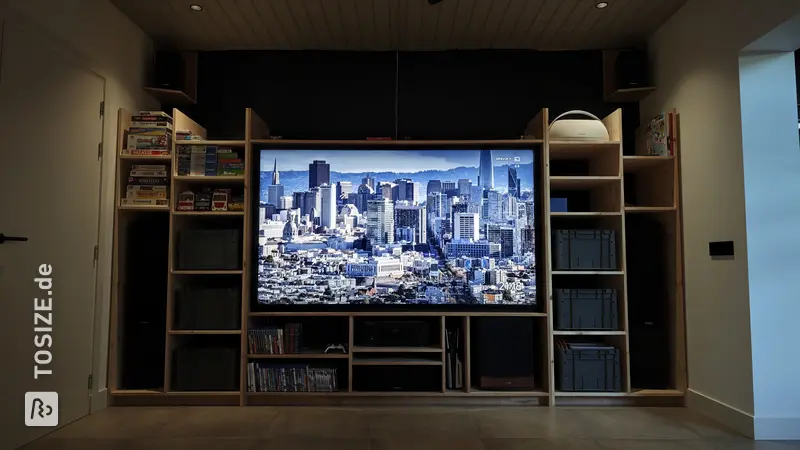
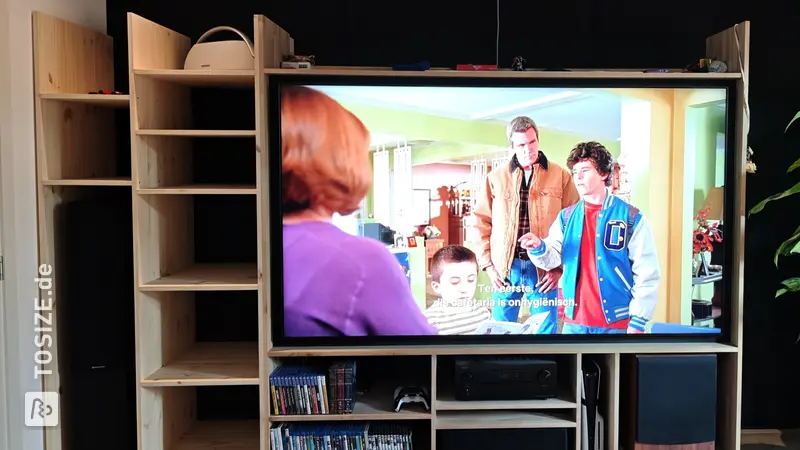
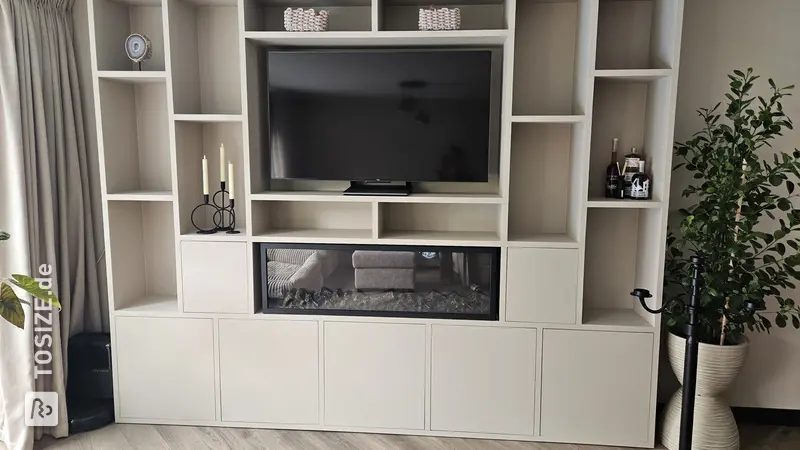
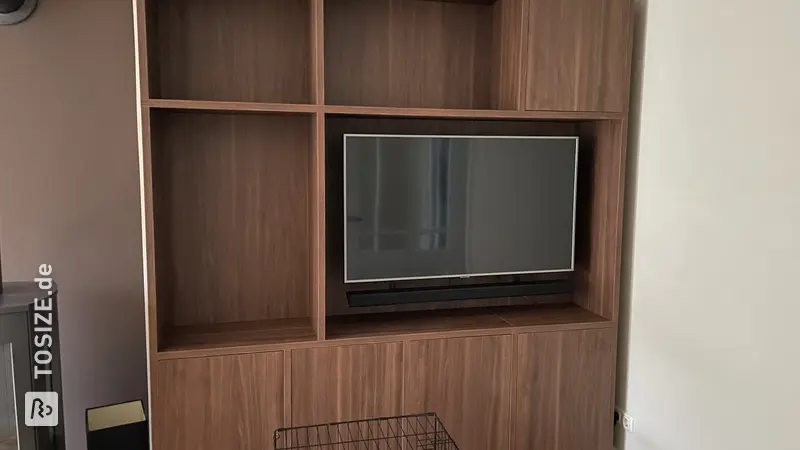
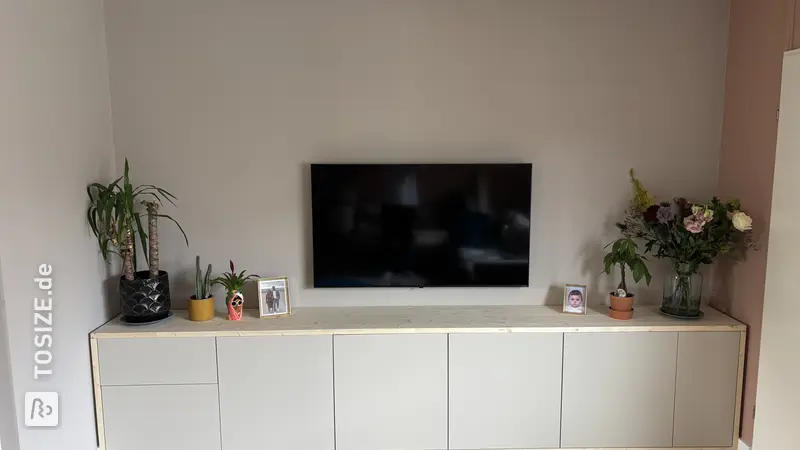
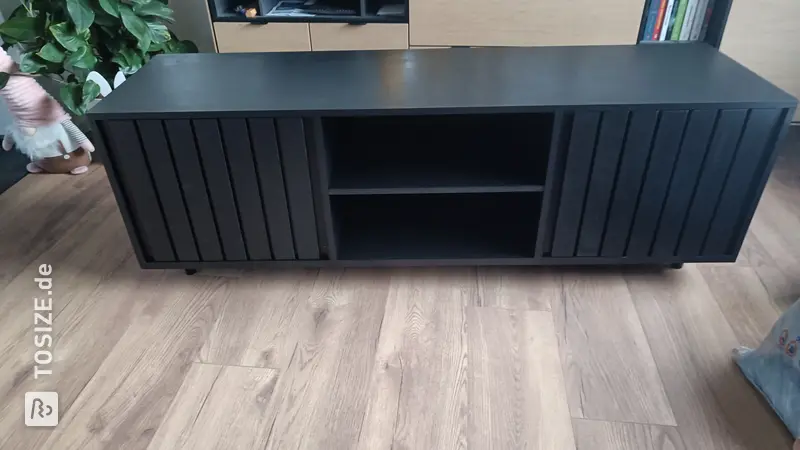
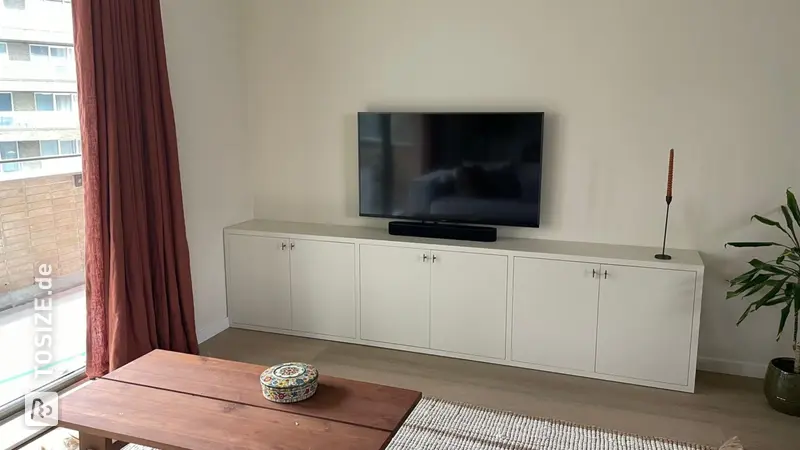
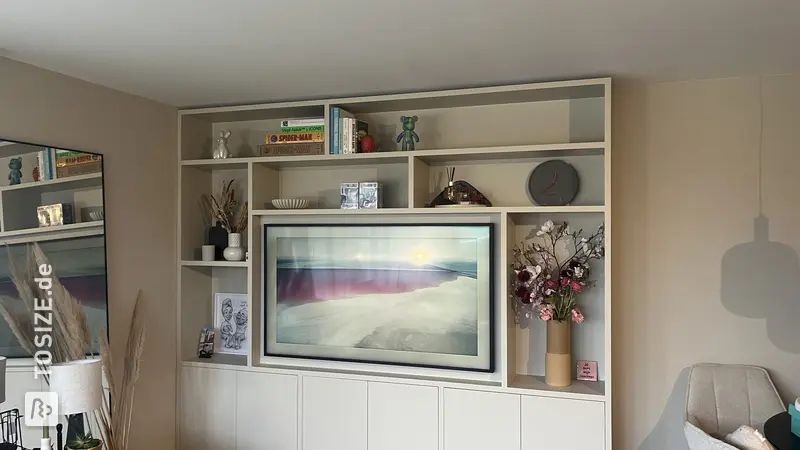
A Stylish and Practical DIY TV Stand
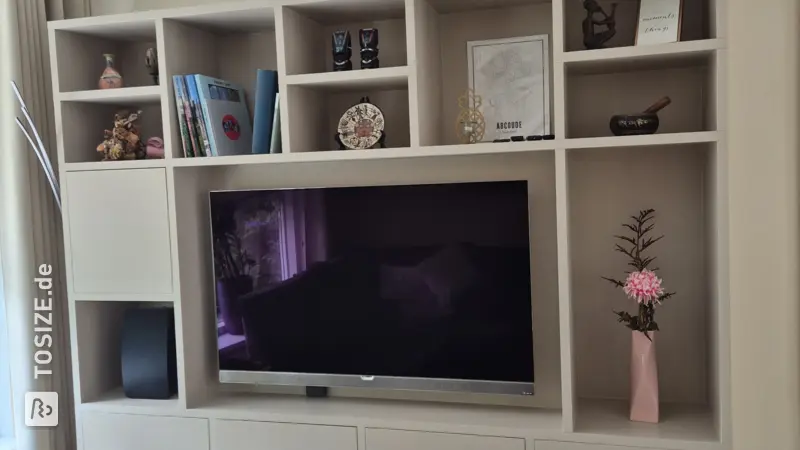
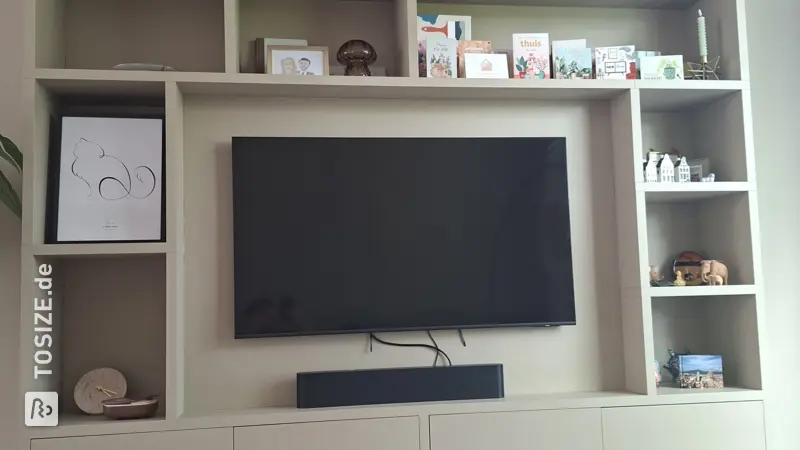
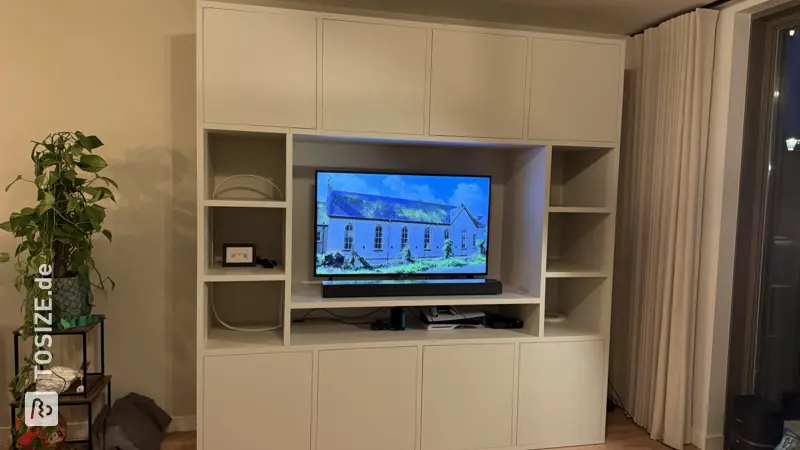
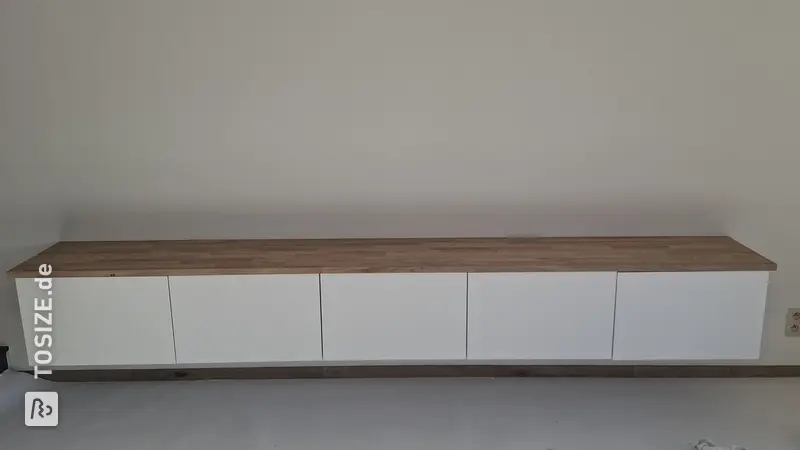
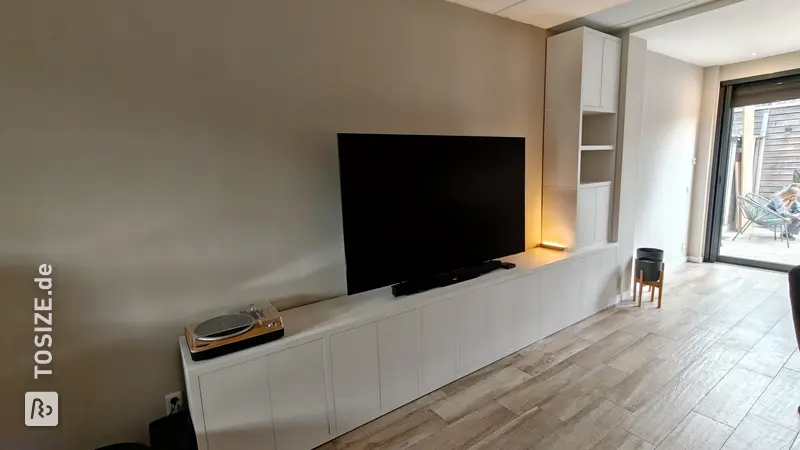
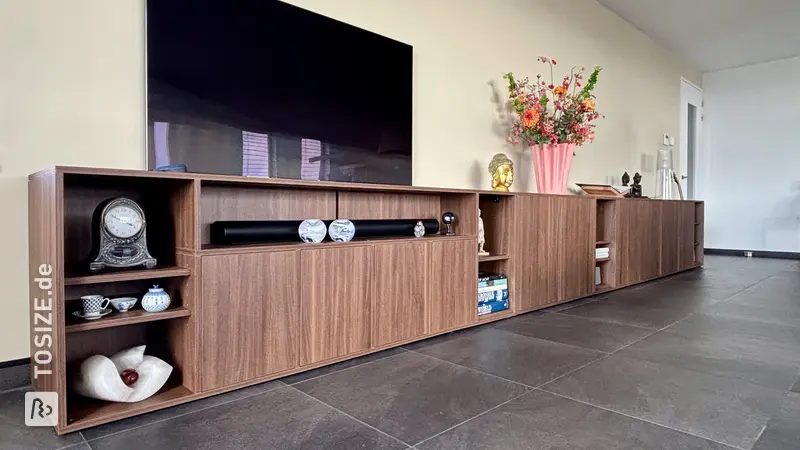
Discover how to make a beautiful and functional TV unit from solid beech panels, precisely cut to size at TOSIZE.de. Jan realized this stunning creation, perfectly fitting the dimensions 175x42x46 cm (lxwxh), all in-house!
Structure and Materials
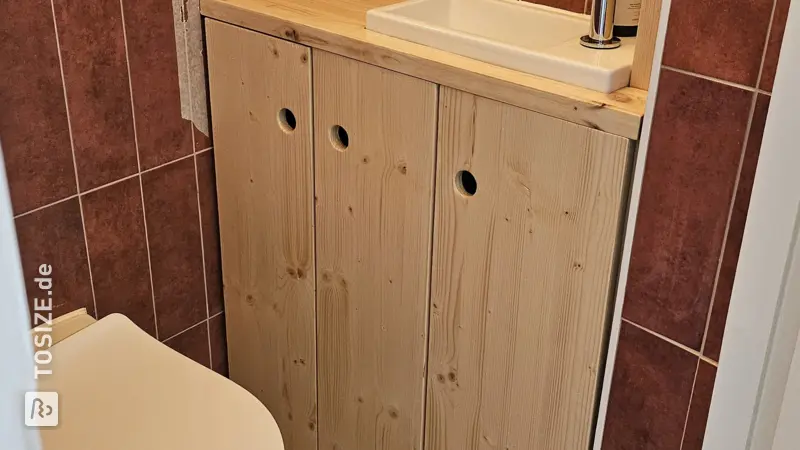
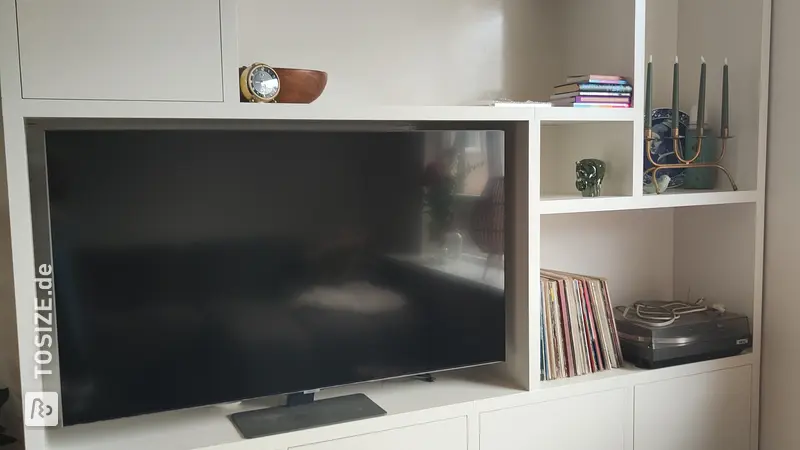
The TV unit is constructed from solid beech panels 27mm and 19mm thick. This high-quality wood provides a sturdy and durable appearance and fits into almost any interior. The natural light color of the beech wood gives the room a warm and modern look.
Perfect Placement
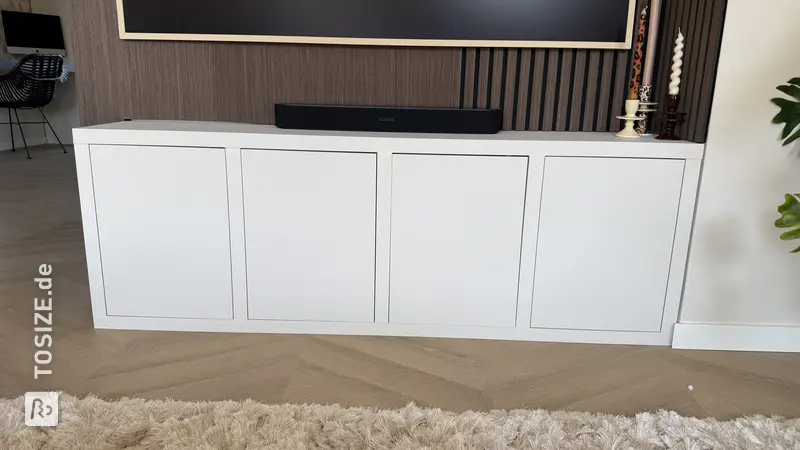
This piece of furniture comes into its own perfectly in the living room, where it is both aesthetic and functional. It offers ample storage space for multimedia equipment without drawing attention away from your favorite programs.
Unique Features
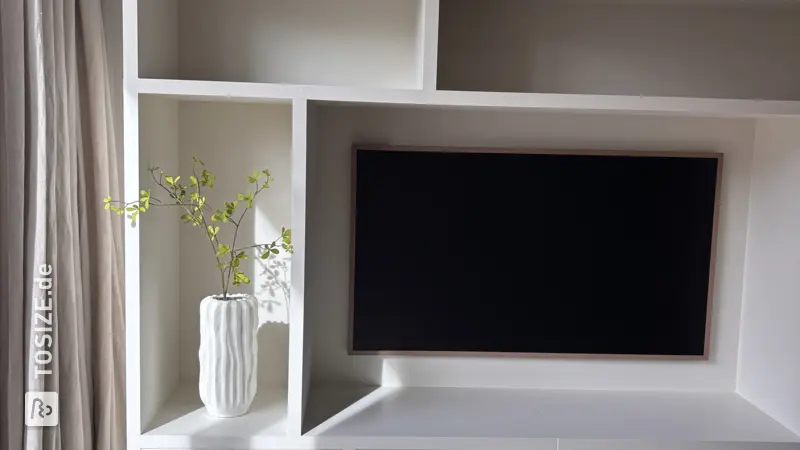
Thanks to the sleek design and subtle finish with concealed screw connections, the furniture looks minimalist yet elegant. The visible wood grain and robust legs make it a sturdy yet stylish element in the room.
Custom-Cut Success
The wood for this project was precisely cut to size by TOSIZE.de, allowing Jan to effortlessly join all the parts together into one perfectly fitting whole. This proves that custom work is a smart choice for any DIYer, no matter how big or small the challenge!
Modern Minimalism
The minimalist style of this TV unit creates a calm and organized look in any living room. It contributes to a Scandinavian atmosphere through the combination of simplicity, functionality, and natural materials.
The Benefits of Beech Wood
Timberboard Beech A/B: Beech wood is particularly suitable for furniture due to its strength and consistent quality. The fine structure and light color make it versatile and attractive for diverse interior use. Moreover, the wood is easy to work with, which is ideal for DIY projects.
DIY tips
Use a good drilling jig to drill uniform holes for blind screw connections to achieve a cleaner finish. Don't forget to clamp everything when gluing or screwing to ensure everything stays perfectly straight.
Tip! Also check out our handy DIY tips!
Step by step guide
Preparation
- Everything starts with a good plan; What do I want, what dimensions, what height is comfortable for watching TV, where will the TV be placed and where do the cables need to be routed, how should it be assembled, what wood thicknesses do I need for appearance and sturdiness, what tools do I have and what do I need to purchase (in my case, a pocket hole drilling jig (Kreg), a long PZ2 screwdriver bit and a cup hinge drill bit (Presch Forstner drill bit)), which screws are needed (Spax PZ2, 5x35, 4-cut), which hinges (Blum Blumotion soft-close, easy to adjust), which feet are needed underneath. Where am I going to build, because you want to leave everything in place so you can easily pick up where you left off later, and finally, how should it be finished (paint or varnish, etc.). Next, all panels were laid out to make the wood grain pattern run continuously as much as possible (for example, the top panel extends into the side panel; the 3 cabinet doors also have a continuous, joined wood grain pattern. (Advice: remove the stickers and mark the panels with a pencil at a specific spot.) which will not be visible). After that, I used saw remnants that I had had delivered along (this is an option when ordering) to make test drillings to determine the drilling depth and to see how two panels join together and how sturdy that is. For the back wall, I still had a matching 9mm plywood sheet of my own.
Montage
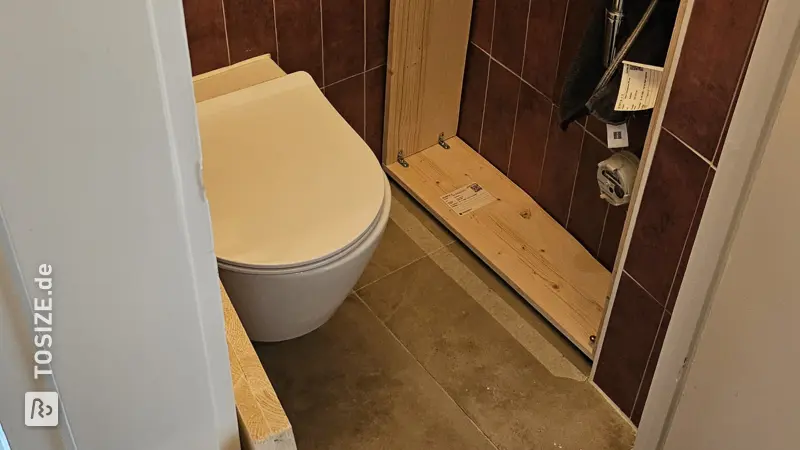
- If step 1 is well thought out, this assembly step is not that difficult. Work very precisely! Do check very regularly to ensure everything fits together nicely at a right angle (if you do this too late, you won't be able to correct it properly because all the drill holes will be as they are and difficult to change). So, also think carefully about the most convenient assembly sequence. Use quality screws as well, because that works much better than the standard stuff from the hardware store. The Kreg drilling jig for angled drilling and screwing the panels works fine, provided you clamp it very tightly. If you don't, the jig shifts as soon as the drill hits the hard wood (this might not be an issue with chipboard or softwood panels, but it is with these beech panels). When clamping, also use small wooden plates between the clamping parts themselves and the panel wood to prevent damage. Finally, the Presch Forstner drill bit works fantastically in beech wood, provided you use the specified low drilling speed.
Finish
- To achieve the best result, I removed all parts of the cabinet that would be clearly visible (top and doors). Next, I sanded the entire cabinet with P180 grit sandpaper (rounding the wood edges slightly as well). Then I wiped off all the sawdust with a brush and subsequently used the vacuum cleaner. After that, I applied clear lacquer (Skylt; the same as on the beech floor) in two coats and finished with Skylt topcoat. I sanded very lightly between coats with P240 grit. All panels have been treated on all sides to prevent warping. I also bought beautiful round solid beech legs online (IPEA brand; 10 cm high, 6 cm diameter) and finished them in the same way. These legs have a centrally drilled screw that is attached directly to the bottom panel using a slightly tight drill hole (use a little white candle wax shavings as a 'lubricant'; works great and leaves no stains on the wood).
- After drying for two days, the cabinet was screwed back together and placed in position. To prevent sagging, two sturdy corner brackets (20 x 20 cm) were screwed to the wall, supporting the cabinet in the middle between the legs. The cabinet was perfectly horizontal, so no further adjustment was needed there. The doors, however, naturally had to be properly adjusted using the hinges.
What now?
Want to make this DIY project? Check out Jan's saw list and complete your order easily.
772,59 €
View all sheet materials
My experience with TOSIZE.de
Order
Delivery
General experience
Found TOSIZE.de when searching online. Beautiful wood. Visited the store for a better assessment of the panels to match them with our beech floor. Friendly and efficient staff. Received wood samples. Entered all dimensions (with names) via the website and placed an order – it was quite simple. A little less than a week later, the panels were delivered by a very good delivery service. I have never seen anyone handle wood so meticulously and carefully, and there was a double-check to ensure everything was correct. The panels were neatly provided with stickers showing the dimensions and the names specified in the order. They were also completely flat and square, and the dimensions perfectly matched my specifications. Tip: do not leave the stickers on the panels for too long, as some glue residue may remain on the wood (which, incidentally, can be easily removed with white spirit).